Friday, 7 March 2014

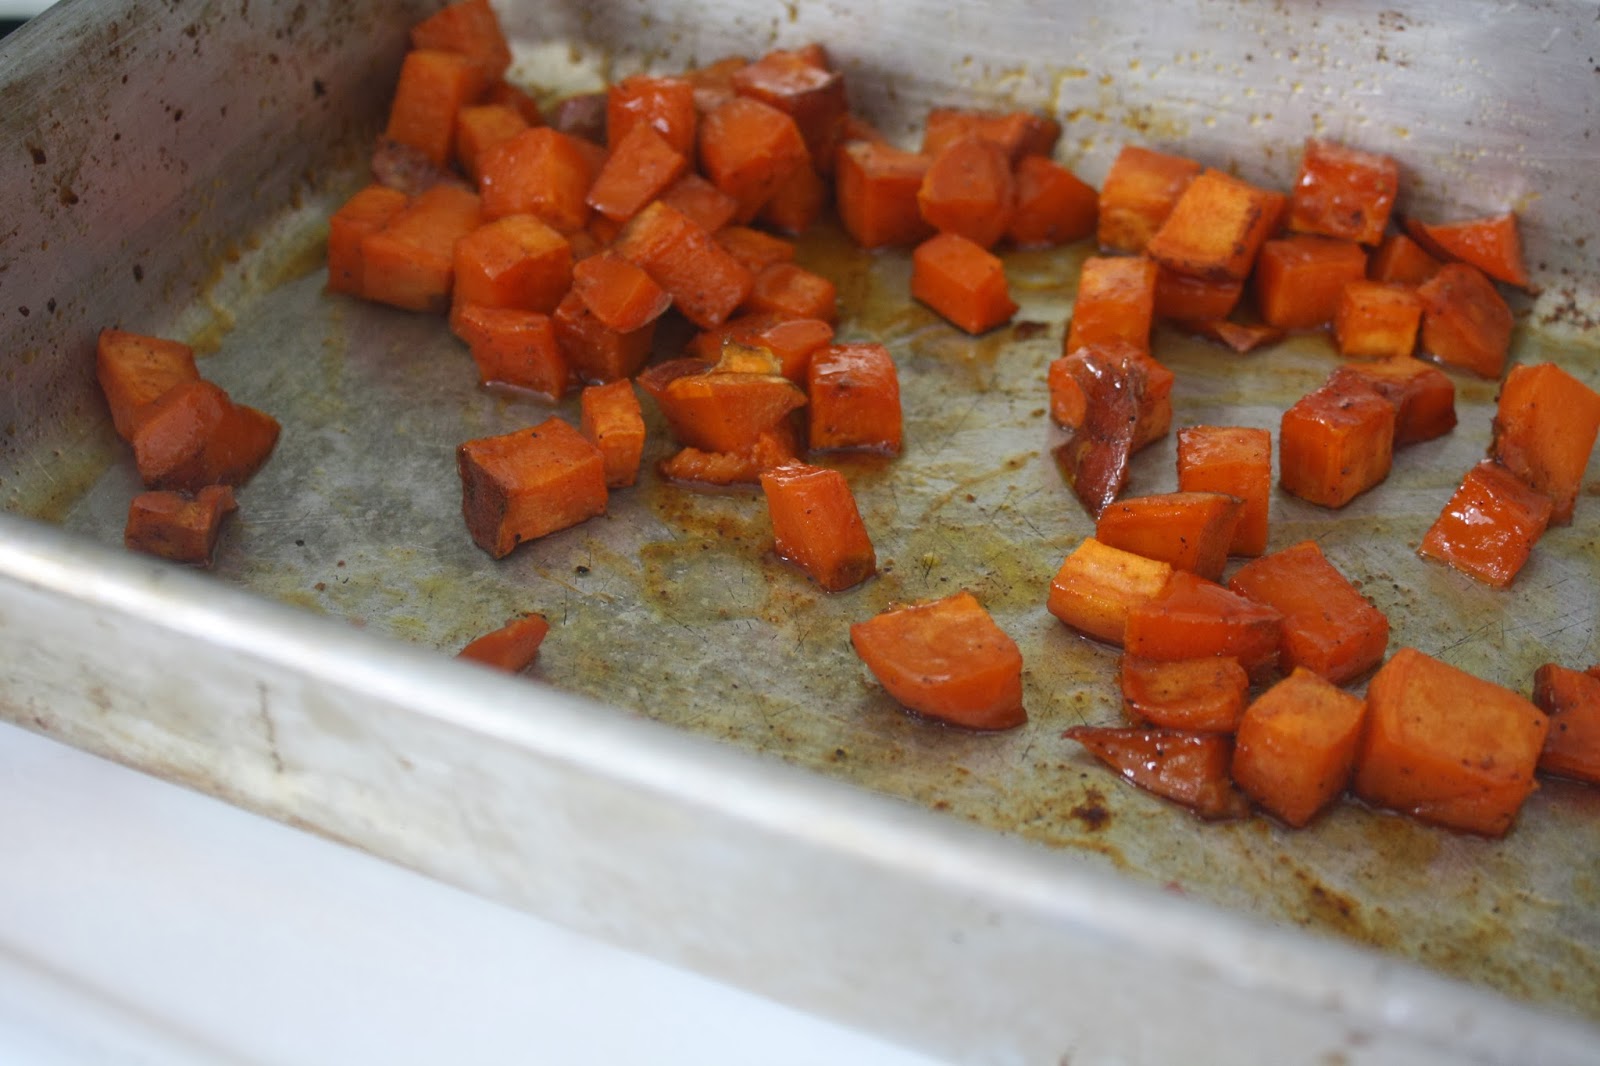
SUPERFOOD SALAD WITH BLACK RICE, BUTTERNUT SQUASH, SWEET POTATO, CRANBERRIES, GOJI BERRIES, SUNFLOWER & PUMPKIN SEEDS


I'm always looking for recipes that can be made at the beginning of the week, but also kept and enjoyed for lunches over the next few days. Some of my favourites are my Pecan-Crusted Basa or Crustless Quiche with Spinach & Sausage. Both are easily transportable and healthy - just add a side of veggies and you have a complete meal!

Grains are also a great option.  Take an otherwise plain grain (rice, bulgur, quinoa) and jazz it up any way you like. Depending on the season, you can choose fresh, vibrant vegetables like green beans and tomatoes, or more hearty ones, like sweet potatoes and beets. Add some fresh herbs, lemon juice, and your favourite oil (have you tried avocado oil?), and you've got a delicious, nutrient-dense meal on the go.

I came across the recipe for this superfood salad ages ago, but only recently did I get around to trying it out. Not only is it a recipe that you can make early in the week and store for lunch the next day, but it meets both of my main criteria when looking for new recipes: it's easy to make and it's superfood qualities make it super tasty! I like efficient recipes that don't require a lot of hassle and that use ingredients I already have around the house or, that if I do have to purchase new, can use over and over again in many recipes to come. This recipe is just that - simple, easy to make - and, of course, delicious!

This superfood salad packs flavour, with roasted butternut squash and sweet potatoes glazed in honey and nutmeg. Add in some sweet and tangy cranberries, chewy goji berries, plus the crunch of sunflower and pumpkin seeds? This salad is action-packed - full of flavour and nutrition. You really can't go wrong. Thanks to Del Sole for the fabulous recipe!


DISCLAIMER: I am not a nutritionist, physician, or any kind of health professional. Everything that you find on my blog is based on my own knowledge and opinion. If you require specific health and fitness advice, please seek a qualified health professional.

Monday, 24 February 2014

EGGPLANT ROLLATINI

This might be one of the best dishes I've ever made.


If you're looking for something to jazz up your menu this week, something that's simpler than it looks to prepare, that tastes amazing, and that makes a healthy dinner and lunch, look no further. It's Eggplant Rollatini.

The original recipe from Food Fitness Fresh Air is completely vegan, but I tweeked it a bit to include ground turkey, substituted the bulgur wheat for quinoa, and omitted the bread crumbs. Simply put, it's an easy recipe to which you can make alterations and it will still taste delicious. Here's my version:

Eggplant Rollatini
adapted from Food Fitness Fresh Air

2 large eggplants, thinly sliced lengthwise (1/4-inch thick)
1/2 lb. extra lean ground turkey
1 large clove garlic, minced
1 lemon, juice and zest
1 cup cooked quinoa
2 cups spinach, chopped
1/2 cup nutritional yeast
1 tsp. salt
1 tsp. red chili pepper flakes
2 tbsp. fresh basil
2 tsp. dried oregano
pepper, to taste
olive oil, for brushing
2 cups marinara sauce

1. Preheat oven to 400 degrees F.

2. Lightly brush eggplant slices with olive oil and sprinkle with salt and pepper. Place them on a hot grill pan and cook until each side is lightly browned. Remove and set aside.

3. In a the same pan, cook ground turkey until browned. Set aside.

4. In a large bowl, combine ground turkey, garlic, lemon juice and zest, quinoa, spinach, nutritional yeast, salt, chili flakes, and herbs. Season with pepper, to taste.

5. Line a large baking pan with aluminum foil. Place a slice of eggplant on a cutting board. Place a large spoonful of the turkey-quinoa mixture in the centre and then fold the two outer edges towards each other so that one just slightly overlaps the other. Don't be afraid to overstuff these, as the spinach will wilt down and any rips or tears will be disguised by the sauce later on. Repeat with each slice of eggplant, placing each roll side by side into the baking pan.

6. Cover with sauce. Bake for 30 minutes or until bubbling. Cool slightly, and serve.

Try This: Another yummy filling might include butternut squash, or wild rice, or cremini mushrooms. You can make your version gluten-free, dairy-free, vegetarian, or vegan. This is a great dish if you're not sure what to make but have a few things laying around your fridge - the possibilities are endless!

image via food fitness fresh air


DISCLAIMER: I am not a nutritionist, physician, or any kind of health professional. Everything that you find on my blog is based on my own knowledge and opinion. If you require specific health and fitness advice, please seek a qualified health professional.
Wednesday, 19 February 2014

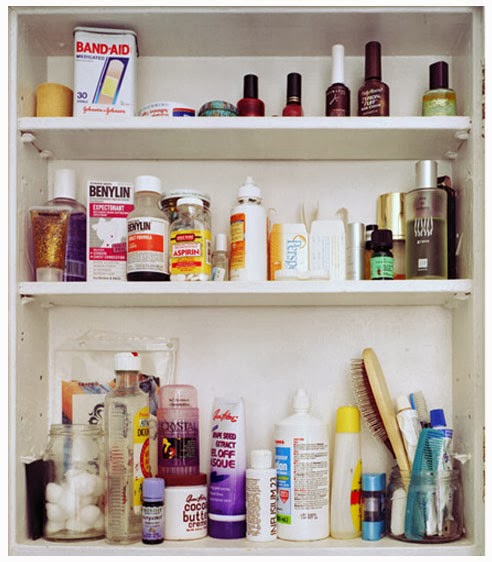
WHAT'S IN MY MEDICINE CABINET?


It's that time of year! You know, when everyone gives each other lovely packages of the cold and flu? Fortunately, I've received no such gifts this winter - and I'd like to keep it that way! In order to do so, however, it's important to always be prepared.

Let's face it, when you're achy all over and can't get a grip on the throbbing pain in your head or put a stop to the flow of mucus from your nose, the last thing you want to have to do is run to the drug store. Unless you're like my friend G, who, when he gets sick with the flu opts out of the usual soup broth diet and makes himself a sweet potato gratin for dinner. Sigh.

Okay, while I'm not recreating Jamie Oliver recipes in the kitchen in preparation for cold and flu season (or during), I do like to keep a well-stocked medicine cabinet in an effort to ward off those pesky bugs.

So, without further adieu, here's a look into my cold season emergency kit:

1. Echinacea - at the first sign of any kind of cold or flu (sniffle, cough, sore throat), I start by taking echinacea. It boosts the immune system, which is important during the sick season, and extra important for anyone with an auto-immune disorder.

2. Vitamin C - in addition to echinacea, I also like to boost my immune system with loads of vitamin C. I'll buy an extra bag of oranges (grapefruit works, too!), and go to town. While it's great if you're able to enjoy these foods and their health benefits all year around, it's not really the case in the middle of a cold Canadian winter - or any time in Canada, for that matter. Whether you choose to take a supplement or bask in the goodness of fruits and vegetables naturally loaded with vitamin C, get it.

3. Oil of Oregano - this stuff is disgusting. I'll only reach for oil of oregano if I feel an extra strong cold coming on, or I've already caught the bug and I'm trying to get rid of it. Some people will take a few drops of oil of oregano under their tongue. I prefer to place 4 drops in a large glass of water and slosh it back. Easy on the gulps, though. The more you gulp, the more you'll be burping. The more you burp, the more oregano after-taste you'll experience. Proceed with caution. For more information about how oil of oregano works, see here.

4. Chicken Soup - it's really important when we're sick that we receive proper nutrition. Ice cream and Jell-O may seem like great solutions to a sore throat, but an overload of sugar (and dairy, weird additives...) is only going to suppress the immune system and make it more difficult to fight infection. Plus, it's a waste of space and calories. Instead, get the most bang for your buck with nutritionally-dense foods. One of my favourite things to have when I'm sick (or on the verge of getting sick) is chicken soup - find my recipe here! Something like chicken soup is great because it's warm, soothing (especially when you add garlic and ginger), and hopefully packed full of great nutrition from vegetables and lean chicken. If you're a vegetarian, a vegetable soup will do just fine. The important part is that you load up on vegetables, because these will be gentle enough for you to digest, and the alkalizing effect they have on the body will help in combatting any virus or infection, much better than any friends of ice cream or Jell-O would.

5. Lemon Water - first, I'm incredibly impressed by how many of my friends actually drink lemon water first thing in the morning. Lemon water is an excellent natural detoxifier in that it helps to cleanse the liver of toxins. It's a great way to start the day and to clean up your digestive system. Just add the juice of 1/2 lemon to a cup of hot water and enjoy! For an extra health boost, add 1 tsp. of fresh ginger.

6. Scarf - I know, this is a weird one, but ever since my eldest brother said that he wore a scarf to bed when he was sick once, I just had to give it a shot. Now several years later, at first signs of a sore throat, I'll wrap my neck in soft scarf and hit the hay. I swear, it works! In fact, I have a felt scarf right next to my bed right now for that purpose. Preparation is key, folks.

What are your go-to remedies during cold and flu season?

image via pinterest


DISCLAIMER: I am not a nutritionist, physician, or any kind of health professional. Everything that you find on my blog is based on my own knowledge and opinion. If you require specific health and fitness advice, please seek a qualified health professional.

Thursday, 13 February 2014

FAKE IT & MAKE IT (WITH CHEESE, PLEASE)

Recently, I had a couple of requests for my 'fake' macaroni and cheese recipe. I call it 'fake,' because it doesn't have any cheese. In fact, it doesn't have any dairy at all. It's a vegan recipe that's super satisfying and easy to make - you'll wonder why you never tried it sooner!

But first, the secret to this cheesy-tasting pasta dish without the cheese. It's something called nutritional yeast, and it's magical and delicious.

It's not cheese, yet it tastes like cheese. 

Everyone who knows me knows that I love love love air popped popcorn. If you knew me years ago, you also know that I used to suffocate my popcorn with another fake cheese product. That white cheddar cheese powder you can purchase in the popcorn/chip/junk food aisle at your local grocery store? That stuff is addicting, but it's also full of weird gunk that no one should really be putting in their body. Then there came the time I discovered nutritional yeast, and that it tasted like cheese! Upon this discovery, I ditched the fake white powdery junk and now always opt for the less processed, healthier alternative (albeit still 'fake' cheese). After a toss of coconut oil and salt, I'll sprinkle some nutritional yeast on my popcorn and voilĂ , delish!


Okay, so nutritional yeast tastes like cheese. It's delicious. You can use it on your popcorn, blah blah blah. But, what about its great health benefits?

1. It's a great source of vitamin B-12. Apparently that's what gives nutritional yeast its yellow colour, but it's also what helps to maintain our energy levels, support mental stability, and reduce the risk of anemia, amongst other fun things.

2. It's high in protein. There's something like 18 amino acids in nutritional yeast, and 6 grams of protein in 2 tablespoons.

3. It's gluten-free. For all those scared of the little gluten monster, you can enjoy nutritional yeast with a happy belly to boot.

4. It's salt-free, too. Ditch the salt. Sprinkle this stuff on vegetables, pasta, or my personal favourite, popcorn (!) for a tasty and guilt-free seasoning.

5. And, there's a bunch of other vitamins and minerals. Such as folic acid, biotin, iron, magnesium, and zinc.

But more importantly, on to the mac 'n' cheeeeese.

You'll probably be surprised to learn that my cheesy sauce recipe is actually from the package of Bob's Red Mill nutritional yeast flakes that I purchased a while back. Though, I have made a few changes, like replacing butter with coconut oil, making this recipe a truly dairy-free (& vegan) alternative. I also used brown rice flour instead of white flour, so that when we pair the sauce with some brown rice pasta, this dish is gluten-free, too. Serve it to friends and family without telling them it's vegan and they'll never know the difference.

Vegan Macaroni & Cheese
with yummy sauce adapted from Bob's Red Mill

1 tsp. mustard
1/4 cup coconut oil
2 cups cold water
1 tsp. sea salt
1/2 cup brown rice flour
1/2 cup nutritional yeast
your favourite pasta, I like rice pasta

1. In a saucepan, whisk together nutritional yeast, flour, and salt.

2. Place pan over medium heat and whisk in water. Continuing whisking as sauce thickens, bring to a rolling boil, reduce heat, cook 1 minute, and remove from heat.

3. Whisk in coconut oil and mustard. Sauce will thicken as it cools, but will thin down when heated.

4. Prepare pasta according to package directions. Once cooked to your liking, strain. Gently incorporate pasta to your saucepan with cheese sauce, tossing to evenly coat. Serve and enjoy!

Makes 8 servings.

Try This: When I was a kid, my mom used to put green peas and canned tuna in our macaroni and cheese - I guess so that there was some kind of nutritional value, because let's face it, our macaroni and cheese came in a box and was labelled as dinner made by Mr. Kraft himself. However, to this day, I still like to toss in some peas and tuna, for ol' times sake. Plus, it's really, truly delicious. Any other ways you like to spice up your macaroni and cheese?

info and image via just good energy and healthy happy life 


DISCLAIMER: I am not a nutritionist, physician, or any kind of health professional. Everything that you find on my blog is based on my own knowledge and opinion. If you require specific health and fitness advice, please seek a qualified health professional.

Monday, 3 February 2014

LESSONS LEARNED '13


2013 was a bit of stressful year.

Okay, it was the most stressful year of my adult life. There, I said it. From trouble in paradise to the serious illness of loved ones, to the death of multiple family members within weeks of one another...and to work stress, which quickly led to financial stress. In the end, I'm screaming into pillows while I experience yet another mini life crisis, just the way Torontonians seem to freak out every year when it snows for the first time. I really just have to calm the heck down. It's just snow, not acid.

But, there comes a time when we realize just how dramatic we've been (and, indeed, how lucky we are). It is then that we must collect ourselves and (re)learn to appreciate everything that we have. To be grateful for all that those troubles in paradise have taught us, to be humbled by the fortitude of those dear to us, and to be grateful for everyday we have to live and breathe (as hokey pokey as that might sound).

As we enter the new month of February (I like to ease into my past reflections and new year's resolutions...), here are the top three lessons from 2013 that I have learned and relearned about gratitude, the relationship between self-care and caring for others, and living in the now.

Appreciate the simpler things, like time spent with loved ones (and your cat).
Whether or not you live in a city, so many of us are part of this race. We're trying to get ahead and we're moving so fast, we've lost any and all sense of direction. We're ambitious, but we're greedy. We've lost any and all sense of gratitude. It's times like these when we need to stop and appreciate the simpler things. Take a breath, take a walk. Reconnect with old friends, get to know new friends. Find gratitude in the simpler things: a good meal shared with family, your ability to conquer that 5-mile race for which you've been training, or being able to sleep in on the weekends.

Take care of yourself and you'll take care of others.
We like to help others. So much so, in fact, that we often neglect ourselves. When we fail to take care of ourselves, however, we can only make so much of an impact in helping others. Whether it's your health, your career, or your personal relationships, it can be just as valuable to satisfy your own needs as it is to satisfy the needs of others. After all, what good are you to those around you if your health is suffering, your professional life is wavering, or your personal relationships are in shambles? Are you one who criticizes others before conquering your own challenges? Find the time to take care of yourself, and you might just find that you're also able to make a world of difference in the lives of others.

Let go of the past, worry less about the future.
It's not that we want to forget the past, but more of us need to learn to move on from the past. Dwelling on the past can be toxic. It serves no purpose in the present, except to be remembered. Living in the past includes holding grudges. It includes using past experiences as excuses for current actions or experiences. Discover ways in which you can live in and appreciate the present. Unplug from your smartphone (this one totally applies to me!) and immerse yourself in the present with activities such as exercise, spending quality time with family or friends, unguided walks in nature, or if you can dig it, meditation. Particularly for those of us who have experienced traumatic events, it can take a lot of courage and maturity to move forward from the past. But, that's not to say it can't be done.

What lessons did you take away from 2013 and in what ways are you looking to improve in the upcoming year?

image via some notes on napkins


DISCLAIMER: I am not a nutritionist, physician, or any kind of health professional. Everything that you find on my blog is based on my own knowledge and opinion. If you require specific health and fitness advice, please seek a qualified health professional.

Thursday, 9 January 2014

WE'RE BAAAAACK (+ CELEBRATORY COOKIES)

Well, that was a hiatus if I ever saw one.

The past few several months have been very hectic. From work to my personal life, I've been on a roller coaster...and not one of those roller coasters where you just go up and come right back down, but one that has many loops and seems to last forever until you feel like you're going to puke your guts out (but in the end, you're on your feet again and your lunch is still intact, woo!).

While I won't bore you with the gritty details of these ups and downs (that's another post for another day, possibly another blog), let's just say I got "busy with life." Don't we all? 

Excuses aside, I'm eager to return to the blogosphere - to share with you my ideas and recipes, and to help answer your questions and contribute to your discussions. After all, it's all of you who keep me writing.

What better way to kick things off than with a celebratory recipe? Why, a celebratory cookie recipe, of course.


There's not a whole lot to say about these cookies. Just try one and you'll see what I'm talking about. Besides containing zero gluten, dairy, and eggs (for all those allergy-ridden friends in your life), they're out-of-this-world chocolate-y and have a great cookie consistency to boot. Don't thank me, though. It's one of my favourite recipes by Erin McKenna of Babycakes NYC, the popular vegan and (mostly) gluten-free bakery (you can see my original blog post about this baking beauty and my visit to her bakery in NYC here).

These cookies were at the top of my list of holiday baking this year, and got rave reviews across the board. From my foodie friends to close family members (and hardest critics), they received two thumbs waaaay up. Heck, those who tried them wouldn't even know they were vegan and gluten-free had I never told them.

They're that good.

Double Chocolate Chip Cookies 
adapted from Babycakes NYC

1 cup coconut oil
1 1/4 cups coconut sugar
1/3 cup unsweetened applesauce
1 tsp. sea salt
2 tbsp. vanilla extract
1 1/2 cups all-purpose gluten-free flour blend
1/4 cup flax meal
1/2 cup cocoa powder
1 tsp. baking soda
1 1/2 tsp. xantham gum
1 cup vegan chocolate chips, these are my favourite

1. Preheat oven to 325 degrees F. Line baking sheets with parchment paper and set aside.

2. In a medium bowl, mix together the oil, sugar, applesauce, salt, vanilla, and cocoa powder. In a separate bowl, whisk together the flour, flax meal, baking soda, and xantham gum. Using a rubber spatula, carefully push the dry ingredients into the wet ingredients and combine until dough is formed. With the same spatula, gently fold in the chocolate chips just until they are evenly distributed throughout the dough.

3. Scoop heaping teaspoonfuls of the dough, roll into balls and place on prepared baking sheets. Space the portions 1-inch apart. Gently press each with the heel of your hand to help them spread. Bake the cookies on the centre rack of the oven for 14 minutes, rotating the trays 180 degrees after 9 minutes. The cookies will be crispy on the edges and soft in the centre. Remove from the oven.

4. Let cookies stand 10 minutes. They're best served warm, but to save them use a spatula to transfer the cookies to a wire rack and cool completely before covering. Place in an airtight container and store at room temperature for up to 3 days.

Or just share and devour immediately!

Makes 3 dozen cookies.

Stay tuned for updates, as Live Free From undergoes some exciting changes!

image via babycakes nyc


DISCLAIMER: I am not a nutritionist, physician, or any kind of health professional. Everything that you find on my blog is based on my own knowledge and opinion. If you require specific health and fitness advice, please seek a qualified health professional.